


We don't have to be professional photographers to brighten our circles: Sometimes a little editing will make all the difference to an image. No need for an expensive Adobe Photoshop, either.
Have you already played with the Photo Editor on Google+?
10 quick ways to make your photos stand out
Google+ has a free, great and easy to use Photo Editor.
It took me about 25 minutes to process all these 10 images from the original photo of a thistle.
Thistle images original album on Google+
Quick how-to for beginners
Choose an image either from your computer or your albums / photos. Copy it to a new album if you wish. You can also add a photo from your hard drive to a post, add text there (with black contours to letters) or click edit. Sometimes you have to refresh and repeat the 'Edit' click before this works. Save and refresh, then you'll see the changes.
- Click on the image to open it up in the Lightroom view (single image view)
- Click on Edit Photo (top left).
- Choose from different ways of enhancing your image but if you wish to save your original as it is, save the edited images as copies, do not replace. They are saved in the same album with the original.
- You cannot alter the saved changes, so be careful with the text editor.
- You may re-edit, even a photo that you have already shared in your stream, perhaps unedited.
If you wish to show the edits, in this case save to replace the original!
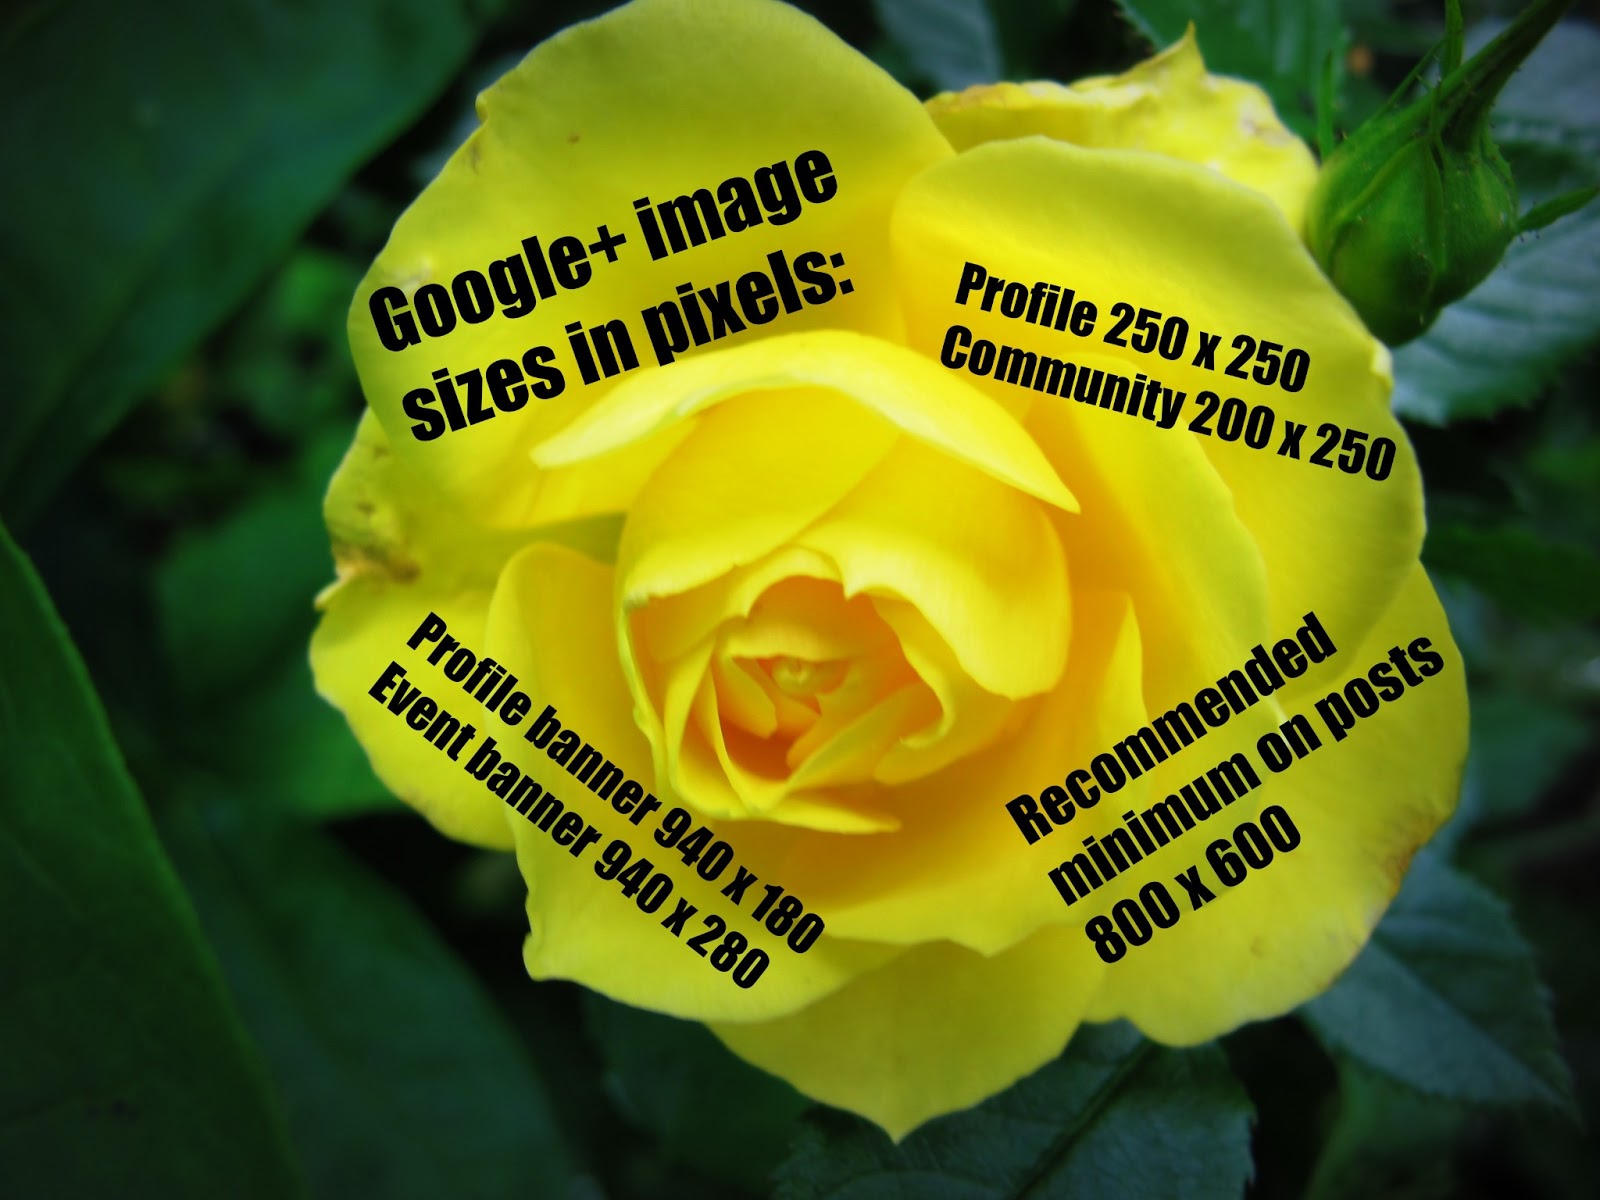
- Recommended image sizes: Profile picture 250 x 250 pix, banner image 940 x 180 pix, desktop image 4:3 (for instance 800 x 600 pix). On many mobiles a square image works better.

Auto Fix will just improve the picture a bit.
On the Basic edits you can also rotate the pic, flip it around, crop it, sharpen or resize, remove shiny bits from faces and more.
Click on the Effects and you will see a frog picture which shows what kind of editing tool is in question. You can experiment by clicking on the frog without saving the image. There is also a possibility to edit these basic effects with sliders. Reala 400 is really nice one to enhance the photos natural colours.
With Decorate you can add speech bubbles, party hats, mustaches or funny faces and many more fun things.
Using the Text you can make your own aphorisms or write on a speech bubble, sign your own photos or make your own memes. Good selection of fonts and colours.

You can edit your own, already published image
Forgot to add text to your photo or edit it before posting?
No problem, you can open it up in the Google+ photo editor directly from the post and save it:
The changes will be visible in your post after refreshing!
How
Your own post: You click on the already posted image, it opens up in the lightroom view. Then you click 'Edit photo' and do what you want. Then you save and 'Replace' the photo. Refresh, and there it is.
See how we can work the Google+ Photo edit:

Me and the tiny coral crab


The tools I used here from Google+ own edit software with some exaggeration:
Lomo-ish vignette on me taking the picture of the crab in a cave, to bring out the corals in front.
Focal B&W on the crab photo I was taking there, to enhance the colour of the tiny creature.
The crab is only the size of your thumbnail, by the way... :-)
Lomo-ish vignette on me taking the picture of the crab in a cave, to bring out the corals in front.
Focal B&W on the crab photo I was taking there, to enhance the colour of the tiny creature.
The crab is only the size of your thumbnail, by the way... :-)
Automatic resizing
All photos uploaded in Google+ will be automatically resized to 2048 pixels (on their longest edge) and won't count towards your free storage quota.
All photos uploaded from the Picasa software or in Picasa Web Albums over the free size limit will count towards your 1 GB of free storage. When you reach your storage limit, any new photos you upload larger than the free size limit will be automatically resized to 2048 pixels (on their longest edge).
Instant upload images and privacy:
I've been asked about the instant upload, will the photos from the phone be publicly viewable...
If the photos are deleted from the phone, what happens then?
- The Google+ photos stay unless you delete them too. If you use Picasa, the images will be visible there also.
- You can always control if something is public or not: If you don't 'share' the pics, they are visible only to you. If you share them to a limited circle or circles, then those people only can see them.
Tagging someone in a photo lets them see the whole album, mind!

Make your own Meme on Google+: Video
If the photos are deleted from the phone, what happens then?
- The Google+ photos stay unless you delete them too. If you use Picasa, the images will be visible there also.
- You can always control if something is public or not: If you don't 'share' the pics, they are visible only to you. If you share them to a limited circle or circles, then those people only can see them.
Tagging someone in a photo lets them see the whole album, mind!
Moving your photos album to album
To get started, open one of your albums and select Organize album from the Options menu. With the album organizer you can:
Sort photos by time: Click Order by date to sort all photos in the album by the photo date, from earliest to latest. Click it again to sort them from latest to earliest.
Reorder your photos: Select the photos you want to reorder and drag them to their new position in the album. You can also move selected photos to the start or end of the album by clicking Move to top or Move to bottom.
Move or copy photos to another album: Clicking Move lets you move or copy selected photos to one of your other albums or to a new album.
Delete a bunch of photos: Click Delete to delete the selected photos.
Once you are done, click Done organizing to return to your album view.
Links
Make your own Meme on Google+: Video
Advice and FAQ about photos support and Google+
Organize your Google+ albums
Video: Edit photos on Google+
Do you have any tips you could share with us?


0 comments:
Post a Comment